Skin Mapping
Skin Mapping
After you have made the Skin itself via the Skin Configuration, you need to map the Skin to the situation where it is used.
This would be a combination of Company, Branch, Service and Activity, or all of them. When the user logs on there is a set
of defaults triggered. These defaults will then be matched against the Skin mapping to decide which Skin should be displayed.

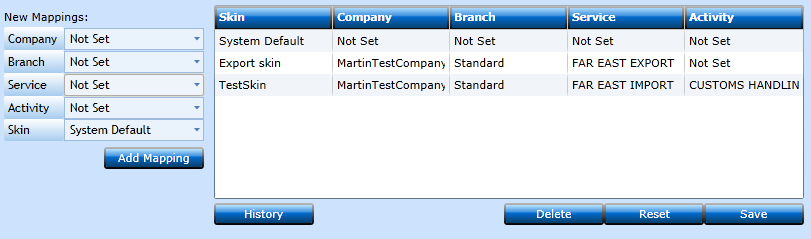
Opening the form there are 2 blocks.
New mappings where you add Skin Mapping and Skin Selection Test where you can see which skin is selected for a specific pair of defaults.
Add Skin Mapping
To add a new Skin Mapping just start selecting from the drop-down lists.
|
Company |
Select the Company where this skin should be used. Not set equals All. |
|
Branch |
If the Skin should be used for a specific Branch then select from the drop-down list. Not Set equals All. |
|
Service |
If the Skin should be used for a specific Service then select from the drop-down list. Not Set equals All. |
|
Activity |
If the Skin should be used for a specific Activity then select from the drop-down list. Not Set equals All. |
|
Select the Skin you wish to map from the drop-down list. |
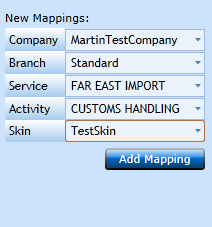
Press the Add Mapping-button [F2] to insert in the Skin Mapping block. Press Save [F8] to store the new Mapping.
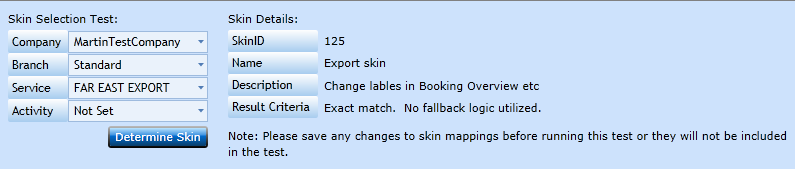
Check Skin Mapping
If you want to test if the Mapping will return the correct Skin you can move on to the Skin Selection Test.
Here you can add the defaults in the left side via the drop-down lists. When you have selected the defaults press the Determine Skin-button.
Now the system will display which Skin will be used for the defaults chosen.