Skin Configuration
Skin Configuration
A Skin decides how the system operates and looks like in a certain situation. You can create multiple skins each behaving differently depending
on the Company, Branch, Service and/or Activity used.
In this program you can adjust the labels, make fields mandatory or even invisible.
Before changing an existing Skin, you have to determine the Skin. Mark the Skin you need to change and press Determine Skin.
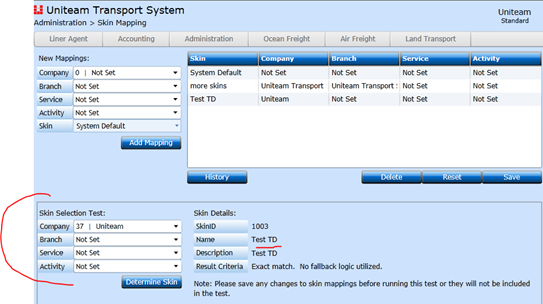
Then open Skin Configuration.
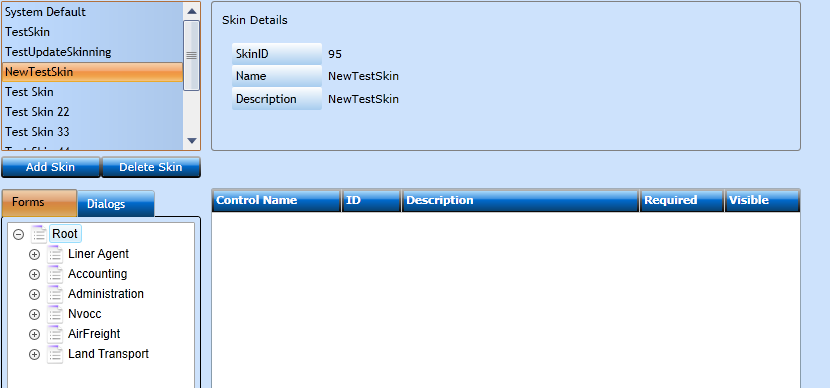
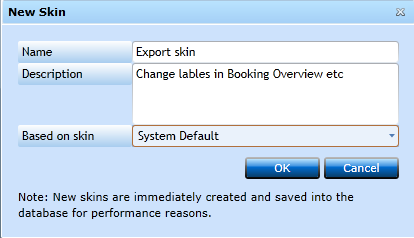
If you wish to add a new Skin press the Add Skin-button [F2] and a new screen pops up.
|
Name |
Insert a Name for the Skin. |
|
Description |
Insert a text describing the Skin. |
|
Based on skin |
Select a Skin from the drop-down list on which you wish to base the new Skin. System default will contain all values. |
Once saved [F8] you can start playing.
Change label (Text)
In any screen you can have the fields identified by pressing [Ctrl+Shift+Y]. Touch any key to go back to regular screen view.
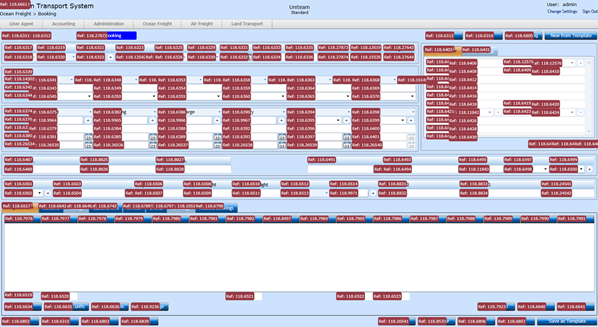
Now you can see a Reference No. for each field – you will need to note the Reference No. after the dot – like “Ref.: 118.6333” – you must note the 6333.
If you are going to make more changes, it could be recommended to open a session more in which you find the field references while changing the skinning in another session.
If you wish to amend the text or label for a specific field you can do this via the Forms tab.
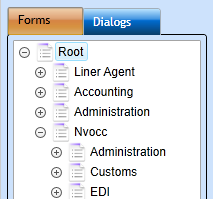
Navigate through the menu tree and find the program you wish to change.
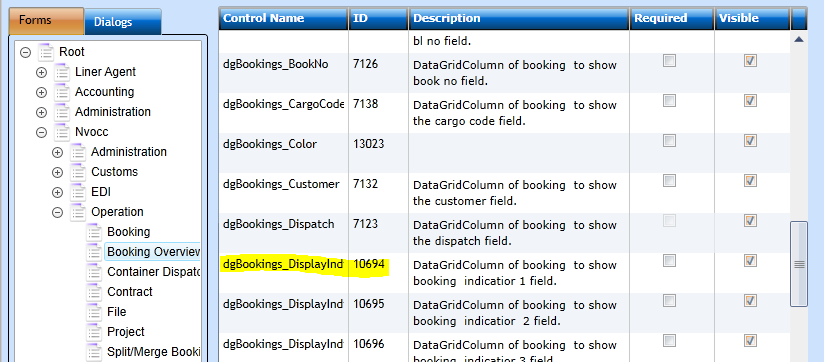
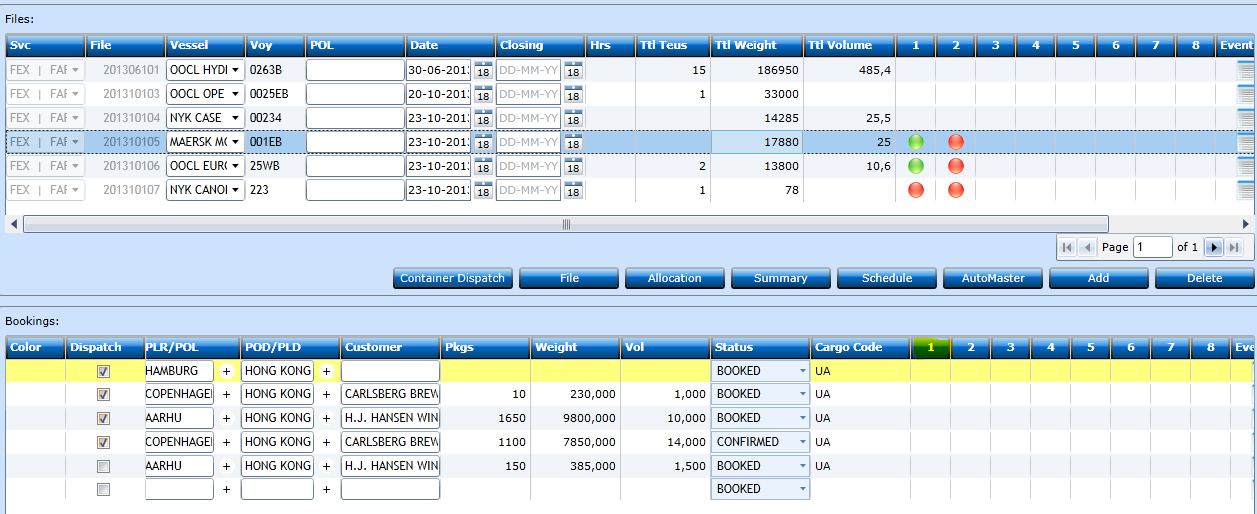
In this example we wish to change the text above the lamp indicators.
In the lower right corner of the screen you can enter the reference number or write the Name/Part of Name of the identifier e.g. ‘Book Indi’ for the Item you wish to edit.
Click in the text dgBookings_Displaylnd, and the line is expanded.
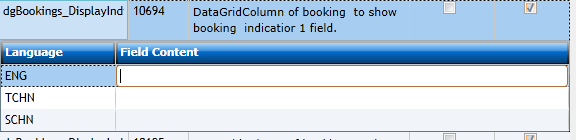
Now you can insert a new text in the Field Content - even for multiple languages if needed.
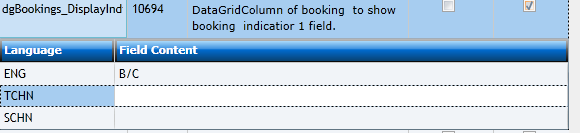
Insert the text and press the Save-button [F8]. Log out and in again and the change is made.
Make a field mandatory or Invisible
You can make a field required the same way as you change the label. Find the field as described above.
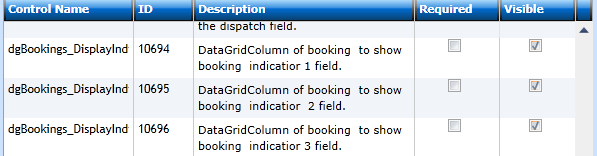
If Required then check the box in the Required Column.
If Invisible then remove the check in the box in the column Visible.
When you have finished creating the Skin you need to go to the Skin Mapping and select the default values to decide using this specific Skin.