Role Configuration
Role Configuration
Each user will be assigned to a Role. The Role will decide which programs shall be visible and accessible. System Administrator is a role predefined which cannot be changed.
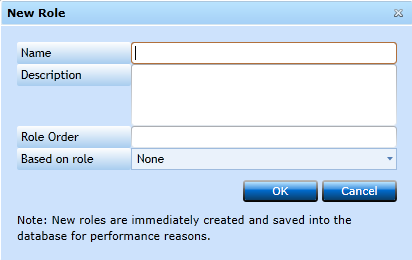
But you can add new roles pressing the Add Role-button [F2]. A new screen will pop up.
|
Insert a Name for the Role. |
|
|
Add a text describing the Role. ! Hint: Add in description, which role you have based this one on. |
|
|
Role Order |
Insert a number indicating at which level this role will appear: 2 - Responsible Financial/Operational Manager 3 - Normal Operational employee 4 - Receptionist, etc. |
|
Here you can reuse settings from another Role and then apply the changes needed. |
When ready press OK.
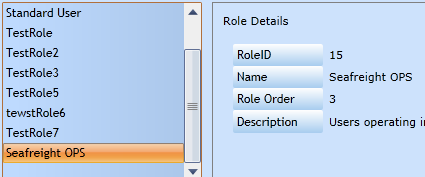
Now select the Role in the window.
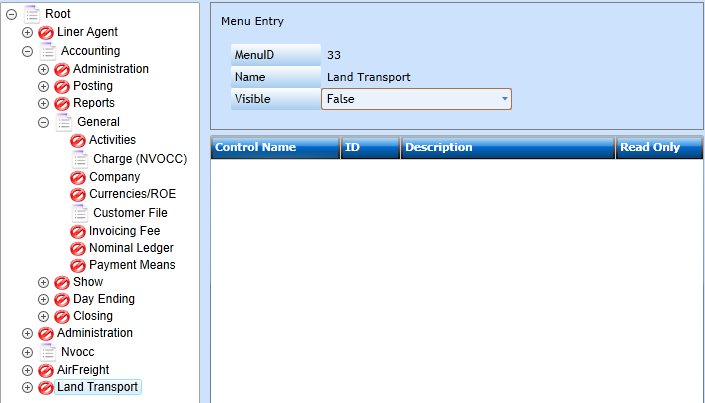
Now you can remove programs from the menus or even remove menus.
Remove a complete menu point from the Role, by placing the cursor in the name.
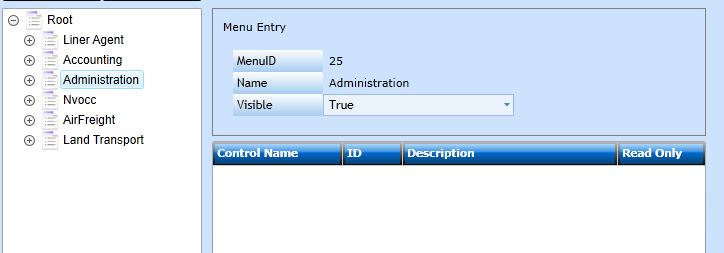
Now change Visible from True to False and an icon will indicate the point is now invisible - or not accessible.
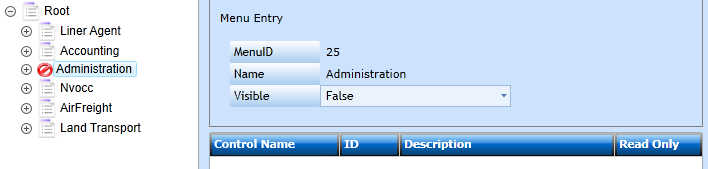
This action can be performed in each level, and now the user has access to Ocean and Charges/Customer in the Accounting section.
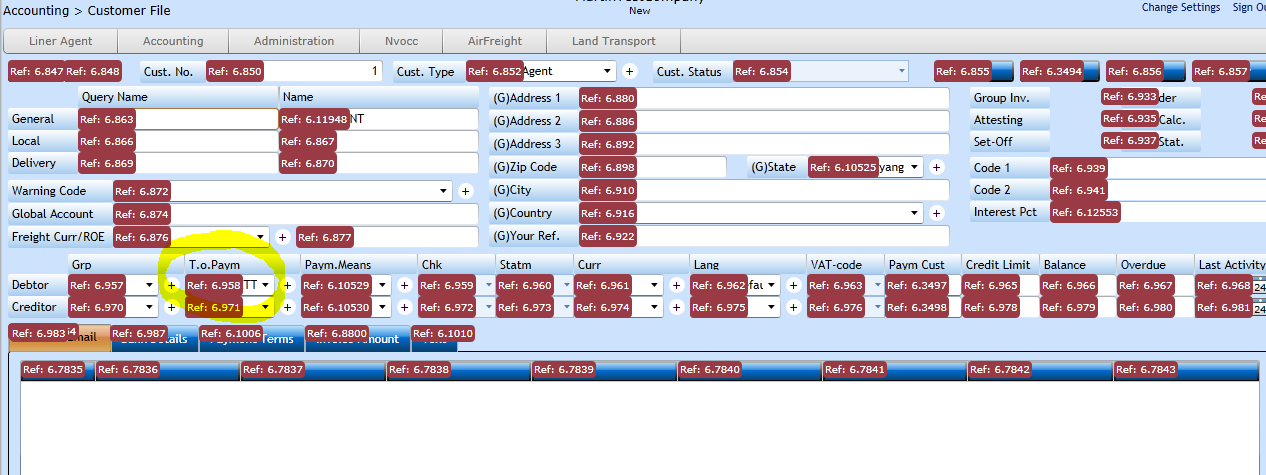
In this example we wish the user to be able to access the Customer Register, but not able to amend Terms Of Payment.
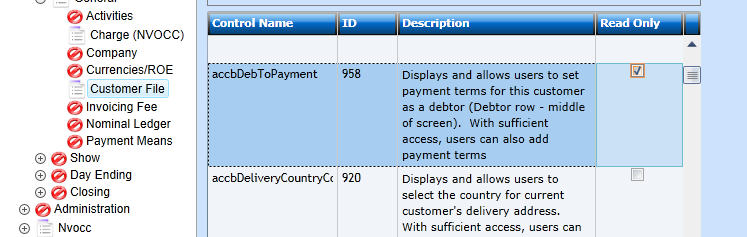
Mark the Customer File and all fields in this program will be shown. Find Debtor Terms Of Payment and check the Read Only box. Remember to press Save [F8].
! Hint. The Control Name might be a little hard to address, but every field in the system has an ID. Opening the Customer File and pressing [Ctrl+Shift+Y] will display the IDs.
In this example Debtor Terms Of Payment is located in program (form) number 6 having ID 958. This will make it easier to find.