Manual Invoice
Manual Invoice
In this window you are able to view, create, copy, or delete an Invoice using the buttons in the top of the screen.

If you want to view an invoice press the Query-button and a new window will display.

Insert the required informations in the search fields or leave empty, and press Search. A list of invoices will display.
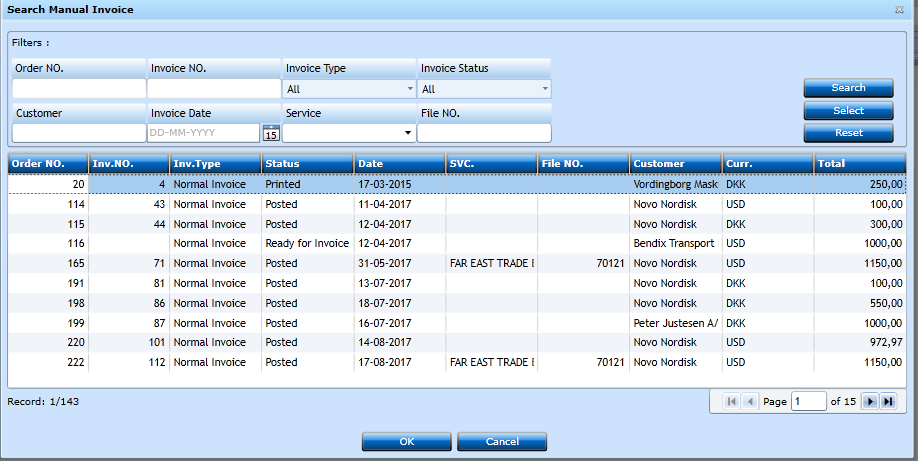
Put the cursor on the invoice line you want to work with and press OK.
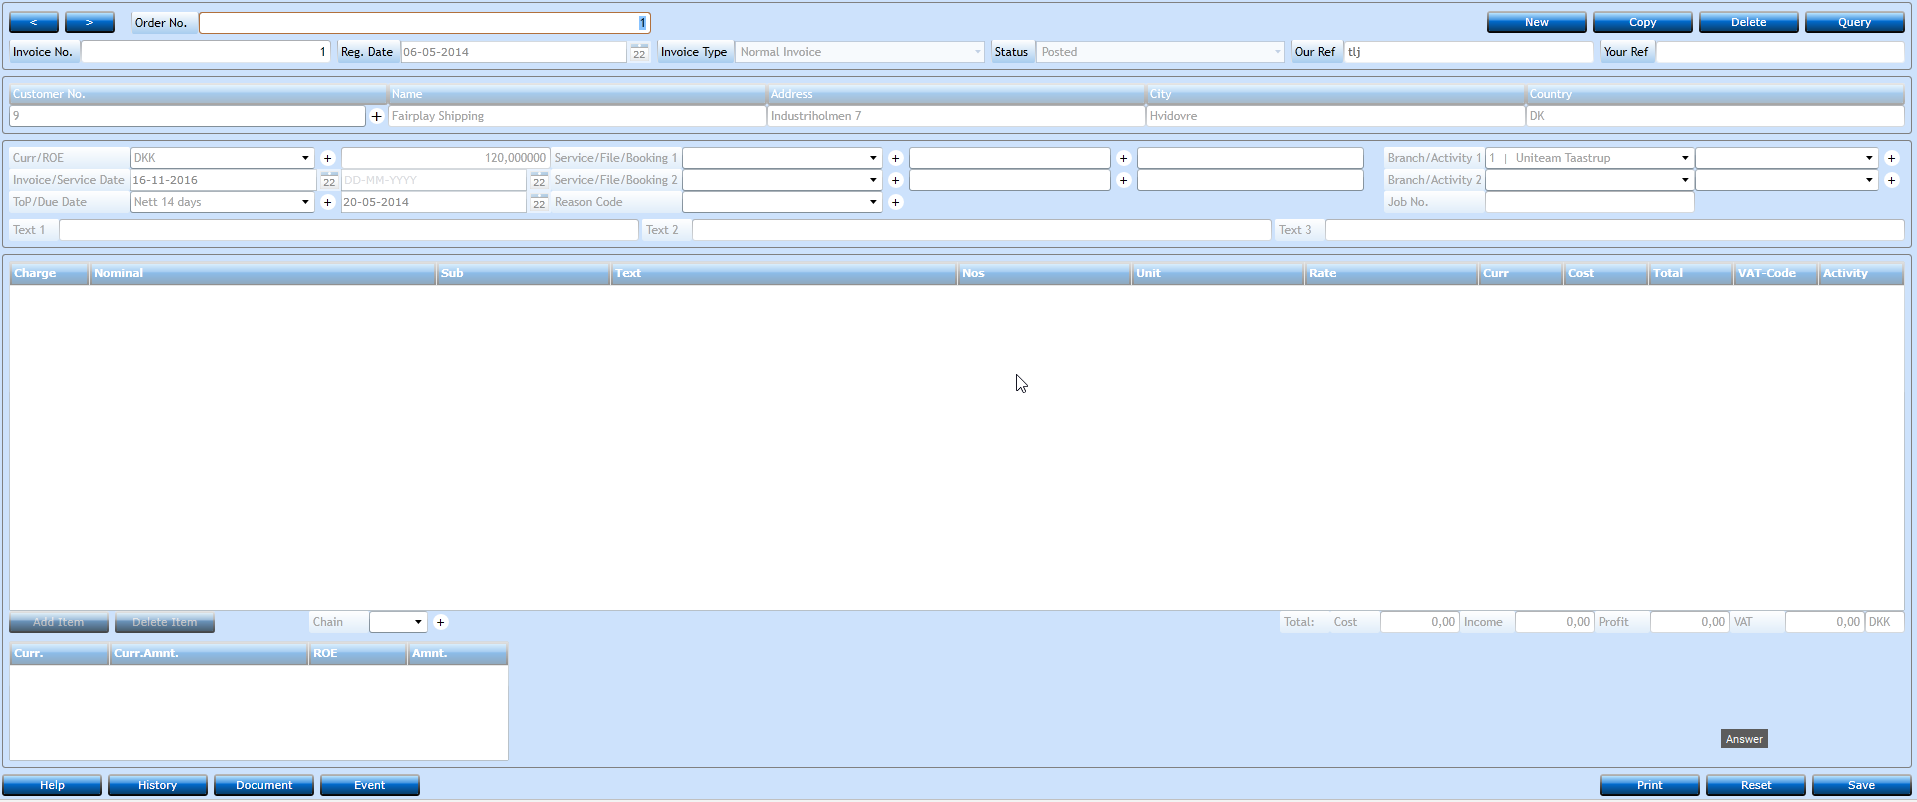
If you want to create a new invoice press New [F2].
|
Invoice No. |
Will be Auto-assigned when Invoice is printed. |
|
Reg. Date |
Will be Auto-assigned to Today's Date. Can be amended by using the Calender-button. |
|
Invoice Type |
Choose Type of Invoice from the drop-down list. |
|
Status |
Shows the Status of the Invoice. Can be amended by using the drop-down list, but only until the Invoice has been Posted. |
|
Our Ref |
Will be Auto-assigned to the user logged on. Can be amended. |
|
Your Ref |
Insert the Customer Ref. if needed. |

|
Customer No. |
Start typing the Name of the Customer and a list of values will display. |
|
Name, Address, City, County |
Will be Auto-assigned from the Customer No. |

|
Curr/ROE |
Will be Auto-assigned, but can be amended. Choose from the drop-down list. |
|
Invoice Date/ToP |
Will be Auto-assigned to Today's Date, but can be amended by using the Calender-button. New Terms of Payment can be used by using the drop-down list,and if you want to create a new Term of Payment press "+". |
|
Due Date |
Insert the wanted Due Date or use the Calender-button. |
|
Service/File/Booking 1 |
Insert the Service/File/Booking No. you want the Invoice to be registered onto. If you want to create new Service or File press "+". |
|
Branch/Activity 1 |
Insert the Branch/Activity you want the Invoice to be registered onto. If you want to create a new Activity press "+". |
|
Service/File/Booking 2 |
Currently not in use. |
|
Branch/Activity 2 |
Currently not in use. |
|
Reason Code |
Insert a Reason Code if needed. |
|
Job No. |
Insert a job number if required. Not mandatory. |
|
Text 1+2+3 |
Free text fields. |
Now you can add items to the invoice. Press Add Item [F2].
|
Charge |
Choose from the drop-down list and a list of values will display. |
|
Nominal |
Choose from the drop-down list and a list of values will display. |
|
Sub |
Used if you need to calculate subtotals in the system. Not mandatory. |
|
Text |
Will be Auto-assigned from the Charge field, but can be amended. |
|
Nos |
Insert the number of items to be charged. |
|
Unit |
Will be Auto-assigned from the Charge field, but can be amended. Start typing the Name of the Unit and a list of values will display. |
|
Rate |
Insert the Rate per Unit. |
|
Curr |
Will be Auto-Assigned, but can be amended. Start typing the Code or the Name of the Currency and a list of values will display. |
|
Cost |
If you want you can insert the costs per Unit for the Settlement, but it is not mandatory. |
|
Total |
Will be Auto-assigned. |
|
VAT-Code |
Will be Auto-assigned, but can be amended. Start typing the Code for the VAT and a list of values will display. |
|
Activity |
Choose Activity from the drop-down list and a list of values will display. |
When finished press Save.
There is possibility to upload relevant documents to the invoice (which will be sent together with the invoice in Invoice Distribution) using drag/drop via the Document button.
To print the Invoice press Print and a new window will display.
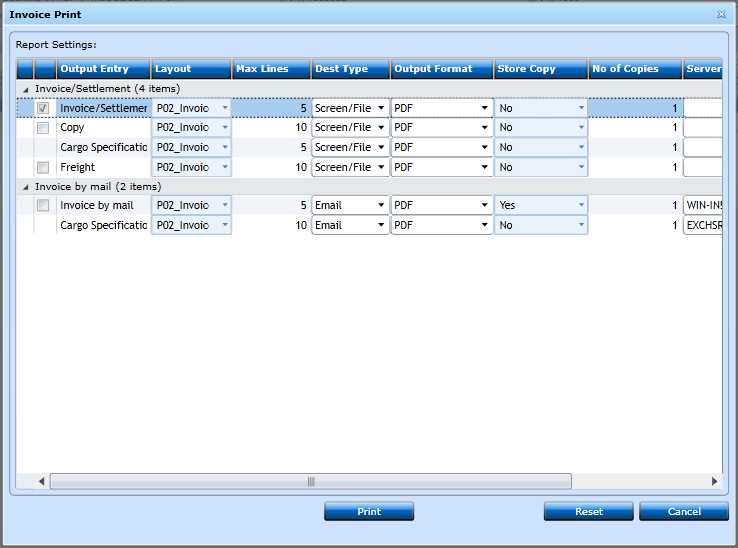
Now you can choose from the menu what to be printed, or sent by mail.