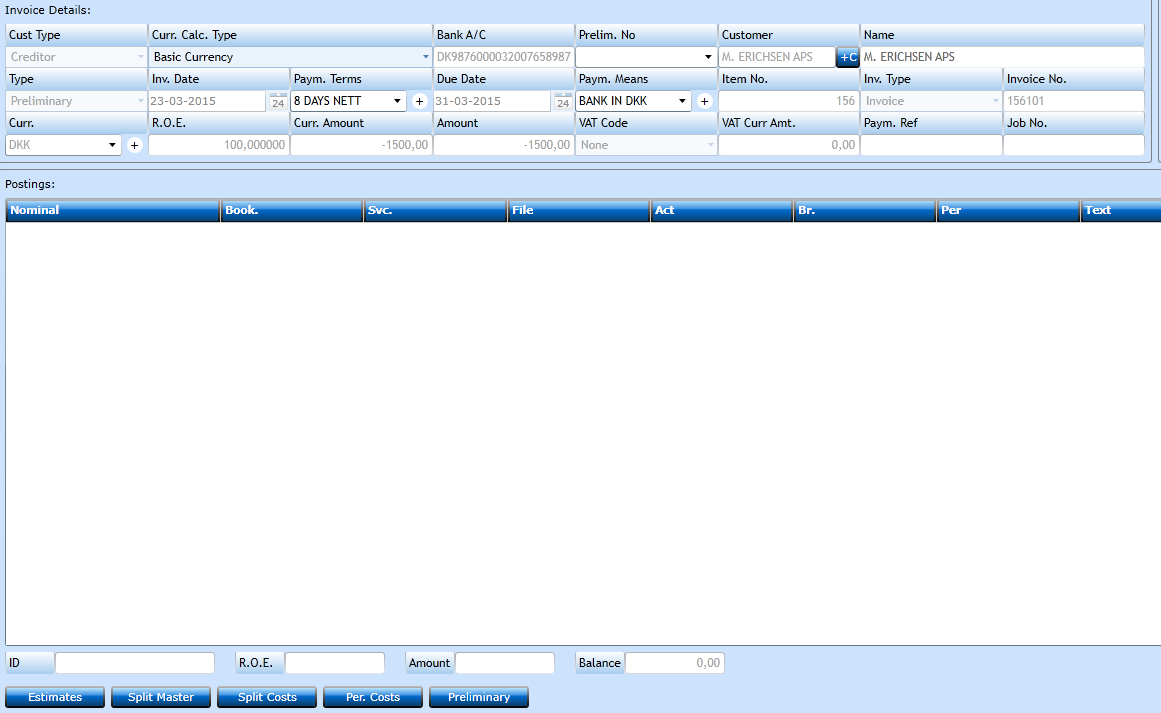
Invoice Registration
Invoice Registration
In this program you will be able to register Vendor Invoice manually. It is also possible to register Customer Invoice, however no Invoice prints will be available, wherefore the
Debtor option is normally used for opening balances. It is possible to link estimates and split costs from Master to House level, as well as split into multiple periods.
Option for upload of related documents available - drag/drop function
In order to insert a new invoice press the New-button [F2].

|
Select if this is a Creditor or Debtor Invoice. |
|
|
Choose between Basic Currency or Invoice Currency. If Basic you need to insert local amount in the lines, |
|
|
Inserting the Customer from the Customer File --> Bank details tab. |

|
If you have already inserted the Preliminary Details you can insert the Sequence and the system will insert all invoice details. |
|
|
Customer |
Insert the Name of the Vendor issuing the Invoice. You can start typing the Name and a list of valid names will appear, or press "+" to insert a new Vendor. Once inserted the address details will be shown in the right side of the screen under Customer Details. |

|
Remark Pop up |
After entering the Customer you may experience a Customer Remarks (Customer Rmks) popping up. |
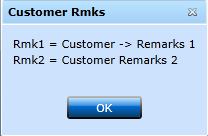
You can insert these in the Customer File under the Remarks field. You need to make sure that the info system has been activated in the Company File as well.
|
There are 3 possibilities in the drop-down:
|
|
|
Defaults to Yesterday's Date, but can be amended to reflect the Date of Invoice. |
|
|
Terms Of Payment will be inserted from the Customer File. You can amend selecting another value from the Code File Terms. |
|
|
The Due Date is calculated from the Invoice Date adding the days in Terms of Payment. |
|
|
Svc.Date |
The Date the Invoice will be included in the Automatic Payment. Field defaults to Due Date but can be amended, if you have a dispute. In some countries they use Service Date for VAT reporting purpose and needs to be set manually. If not used and updated system will default Service Date as Inv. Date. |
|
Paym. Means |
Payment method will default from the setting in the Customer File, but can be amended selecting another value in the drop-down. |
|
A Sequence No. assigned by the system, or you can keep a manual system and insert the number. |
|
|
Select if this is an Invoice or a Credit Note. |
|
|
Insert the Invoice No. |
![]()
|
Will default to the value from the Customer File, but can be amended manually. |
|
|
The Rate of Exchange will default from the Currency File, but can be amended manually. |
|
|
Insert the total amount (incl. VAT if applicable) in the Currency of the Invoice. |
|
|
Based on the Currency and the Currency Amount the system will calculate the amount in local Currency. You can amend this manually. |
|
|
Select the correct VAT Code. Default is set from the Customer File but you can choose any Code which has been defined in the Company File. |
|
|
The VAT amount will be calculated based on the VAT Code chosen. This can be amended manually. |
|
|
Here you can insert a reference following the payment. This would typically be a unique reference for this particular Invoice, such as KID, OCR or FI number. Insert the full string leaving out "+", "<", ">" and other signs shown. |
|
|
Job No. |
Possibility to insert an extra reference, in order to identify a specific job. In Show Job No. you will then be able to consolidate all postings on this number. |

In the last line of the invoice header you must insert the amounts.

Once you have finished this part press the Post-button. Now the A/P and VAT nominals (if used) will be loaded to the Lines block.
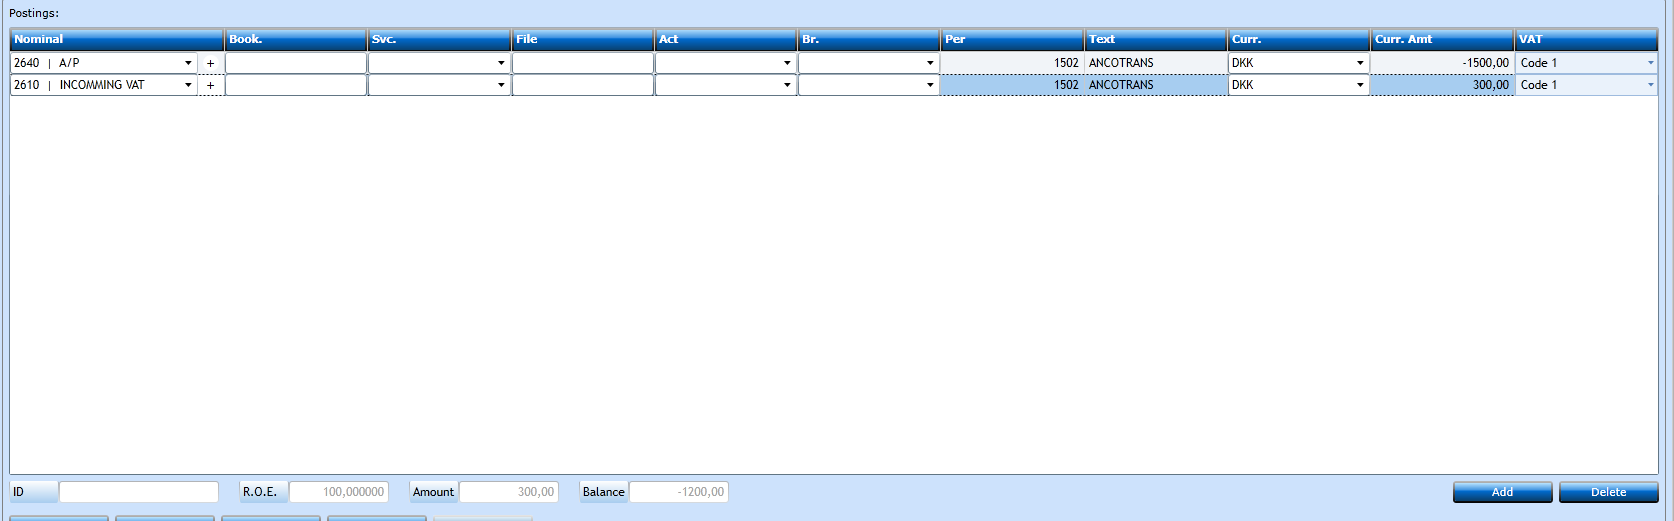
In order to insert the Cost Nominal press Add [F2] and a new line will be ready for insertion.

|
Select the Nominal using the drop-down. You can choose to insert the number or start typing the text and the system will display a list of valid Nominal. |
|
|
Book |
You can insert the Booking No. of the shipment. If existing the system will automatically insert values in Service and File. Activity and Branch will also be inserted if these exist in the Booking Level. |
|
If the Nominal requires a Service Code you can select from the drop-down, or type manually. |
|
|
If the Nominal requires a File No. you can select from the drop-down, or type manually. |
|
|
If the Nominal requires an Activity Code you can select from the drop-down, or type manually. |
|
|
If the Nominal requires a Branch Code you can select from the drop-down, or type manually. |
|
|
Period will display the Posting Period corresponding to the Invoice Date. |
|
|
Text will display the information which will be saved in the database. |
|
|
Currency will display the Basic Currency and can only be changed if you selected Invoice Currency in the Currency Calculation Type. |
|
|
Insert the amount to be posted onto the Nominal. If you simply tab through the system will insert the balance displayed in the bottom of the screen. |
|
|
Will display the value of the VAT Code the amount is subject to and should not be changed as it can be used to generate VAT reports. |
If the Invoice registration is ready press Save [F8]. If you need to split the invoice into multiple nominals or Booking, Service or File press Add [F2].
In the lower left part of the screen there are additional buttons. These can be activated once the A/P and VAT lines are inserted automatically.

We will go through the functions here.
Estimates
In all bookings and files you can insert estimates. An Estimate is a registration of Expected Costs to be received from
a Vendor for a certain Shipment or File. Check the Invoice Part of the Booking for further details.
Pressing the Estimate-button will open a new screen.
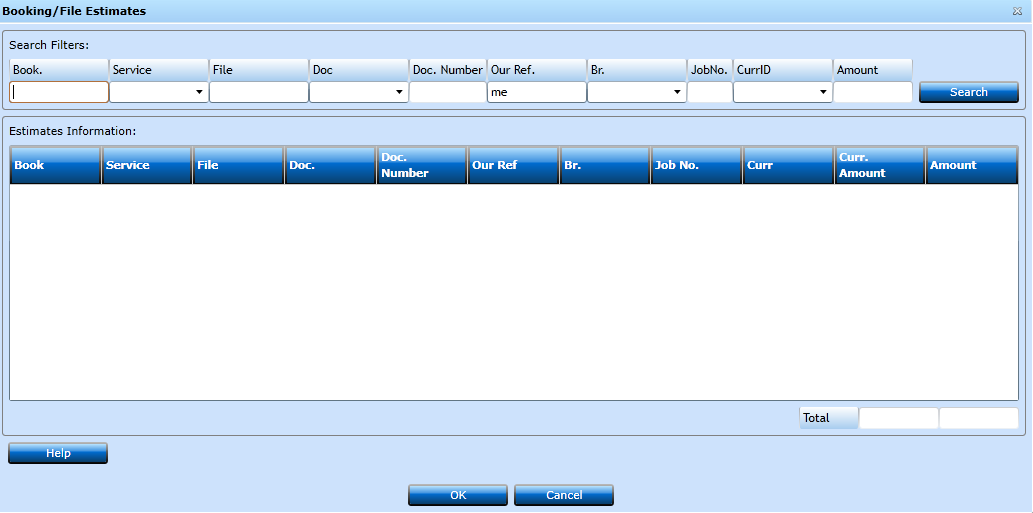
Here you can insert filters or simply press Search, and the estimates for this Vendor will display.
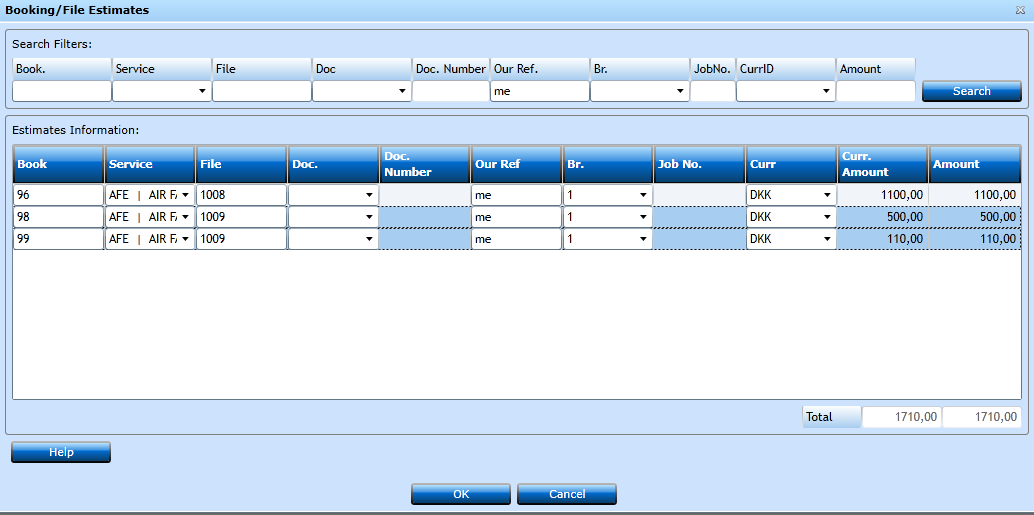
Select the estimate(s) you wish to link to the Invoice and press OK.

The system will now insert the estimate(s) in the Invoice Lines. In above example there is a difference, which you can adjust manually.
The estimate in the Booking will now change status to Posted.
Split Master
This function can be used when receiving an Invoice referring to the Master, but you wish to post the costs onto House Level.
Periodic Split
You can use Periodic Split if you have prepaid an Invoice, and wish to split the costs into multiple periods. Same if the Invoice cover costs affecting previous periods.

In the Invoice Lines the costs are posted onto a balance account for prepaid expenses. Press the Periodic Split-button and a new screen will pop up.
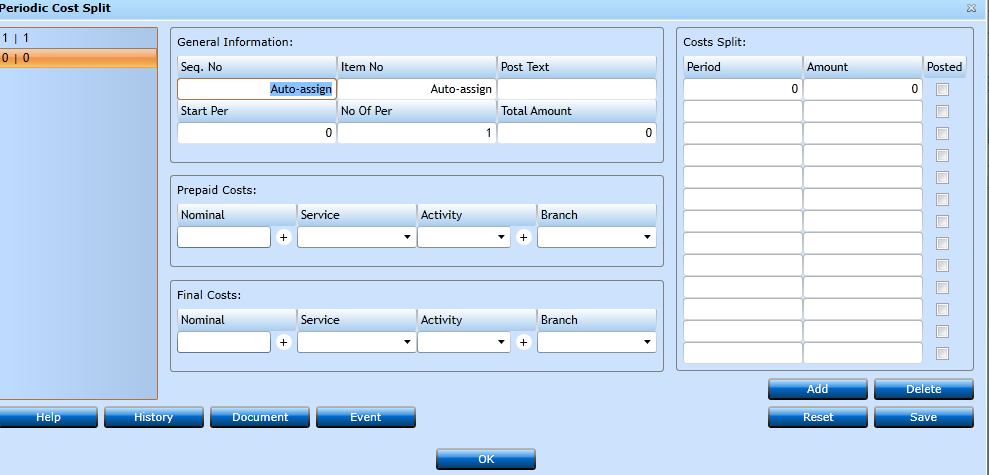
Please refer to the description here for inserting details.
Once finished press Save [F8] followed by OK. Back in the Invoice Registration screen you can now press Save [F8] or the posting as a whole.
Preliminary Posting Button
If you chose the Type Preliminary in the top of the Invoice it has a status where not yet finally accepted. It has not been assigned to a cost account,
but merely between the standard A/P and the preliminary A/P - the VAT Nominal if applicable.

Now you wish to move the amount from the Preliminary A/P to the Costs Nominal.
Press the Query-button in the top right corner of the Invoice Registration screen and a new screen pops up.
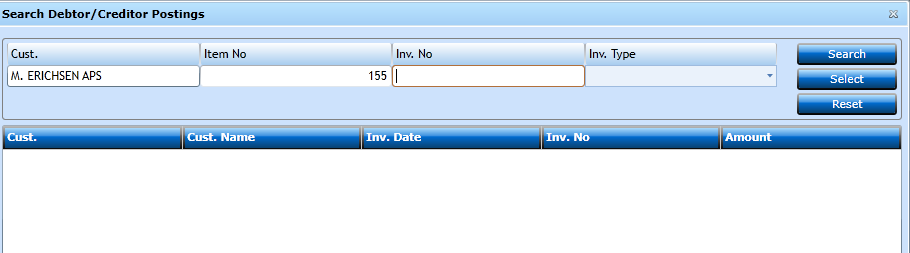
Insert the details you need to find the Invoice and press the Search-button since this will be a perfect match the details will be returned to the Invoice screen.
Now press the Preliminary-button.

Now the system will credit the Preliminary Nominal and you can press Add [F2] to insert the correct Costs Nominal.

When finished press Save [F8] to finalize the posting.