Booking Overview
Booking Overview Ocean
Booking display (File display described here after)
The Booking Overview Ocean is meant as a display on the Bookings you work with.
You will see each Booking with some general details, based with some mandatory information on the left side, which will stay visible when you scroll to right, and on the right side more details on the individual booking.
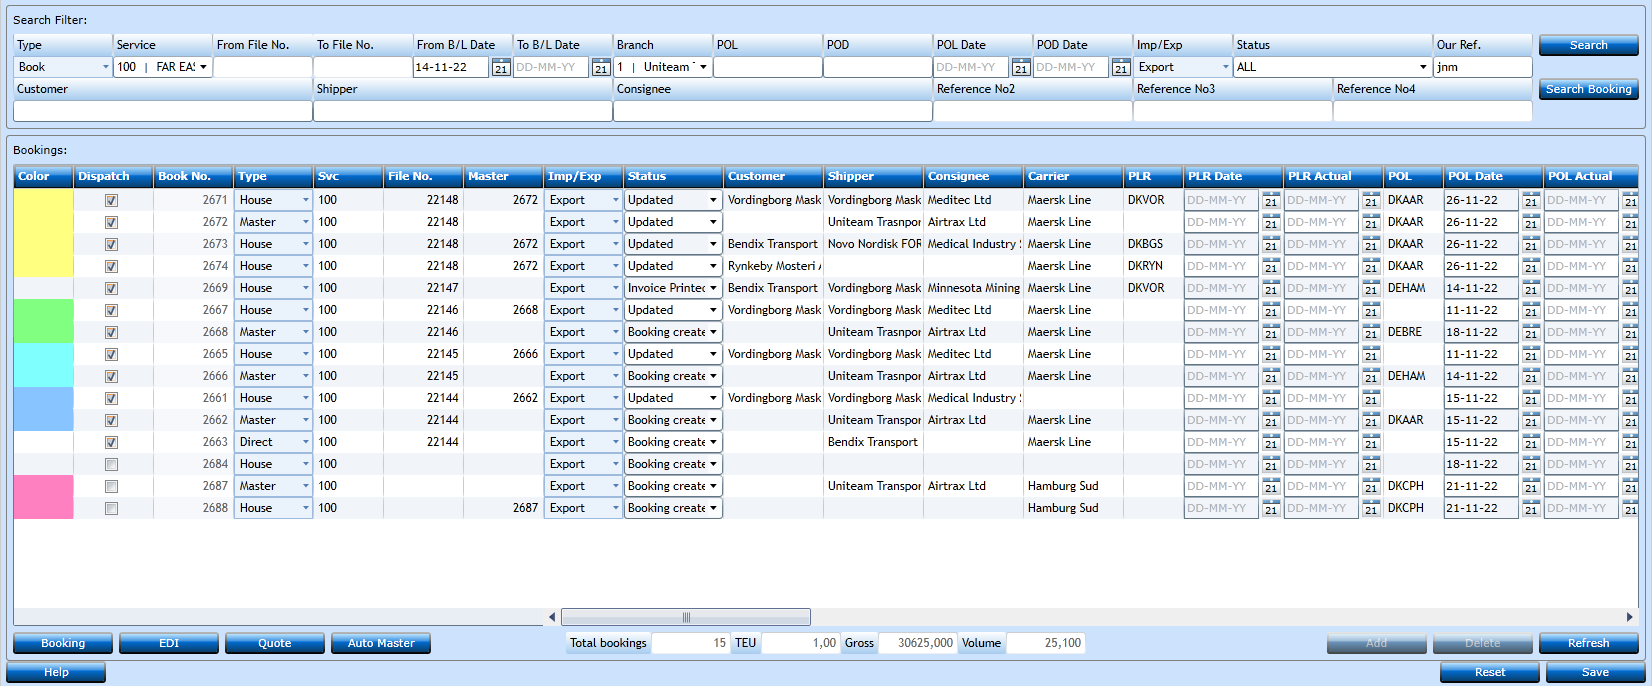
Search Filters (Type: Book)
The system will have the default filters from the user and start a Query. This means that it will default to your Standard Profile setting for Branch, Service and a date a week back.
Example of setting:
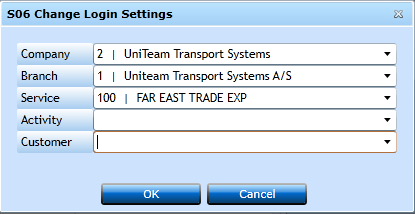
You can alter these filters in the Profile Settings program.
You can of cause alter the criteria yourself as well.

Depending on the button you press the system will filter different.
|
Search will search the bookings matching the criteria you have input. |
|
|
Search Booking button will popup the Booking Search screen from the Booking module. This will make it possible to search on individual bookings. As with the Booking Module, you can only bring 1 booking back to the Booking Overview screen. |
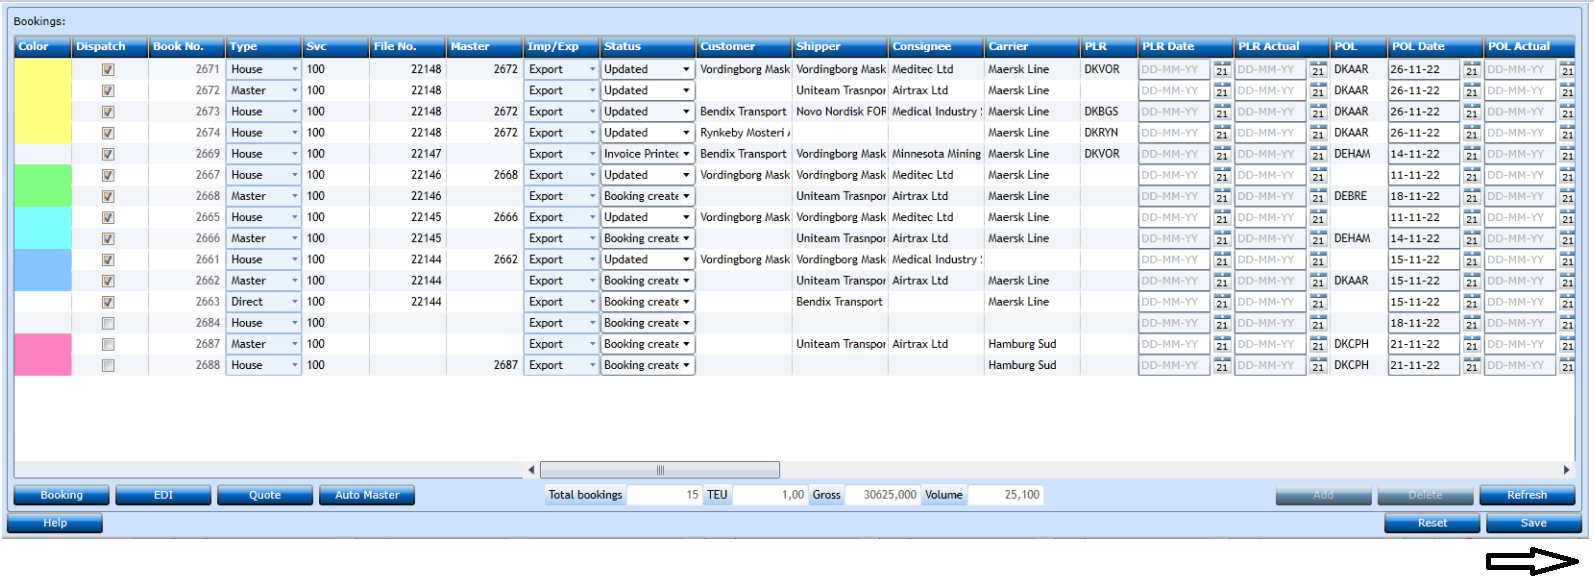
In above block you will see the details of the bookings.
|
Color |
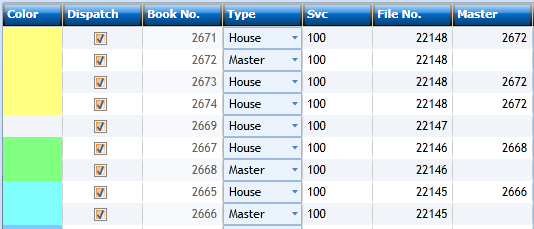
The Color will display Houses already dispatched to a Master. If multiple Masters there will be more colors. |
|
Dispatch |
If checked the Booking is dispatched to the File. If not checked the Booking is not dispatched. |
|
Display the unique Booking No. |
|
|
Display the Type of Booking. |
|
|
Display the Service. |
|
|
Display the File no. if the booking are updated/dispatched on a File. |
|
|
If dispatched to a Master, the Master Booking No. is shown here. |
|
|
From here you can scroll to the right |
|
|
Display if Import or Export (Valid if no Service have been set in the parameters.) |
|
|
Display the Booking EVENT Status. (Only if Book Event Status have been updated, and Status mapped to an Event in the Administration settings) |
|
|
Display the Customer placing the Booking. |
|
|
Display the Shipper. |
|
|
Display the Consignee. |
|
|
Display the Carrier. |
|
|
Display the Place of Receipt. |
|
|
Display the Expected Place of Receipt Date. |
|
|
PLR Actual |
Display the Actual Place of Receipt Date. |
|
POL |
Display the Port of Loading. |
|
POL Date |
Display the Expected Port of Loading Date. |
|
POL Actual |
Display the Actual Port of Loading Date. |
|
|
|
|
To be continued under next image |
|
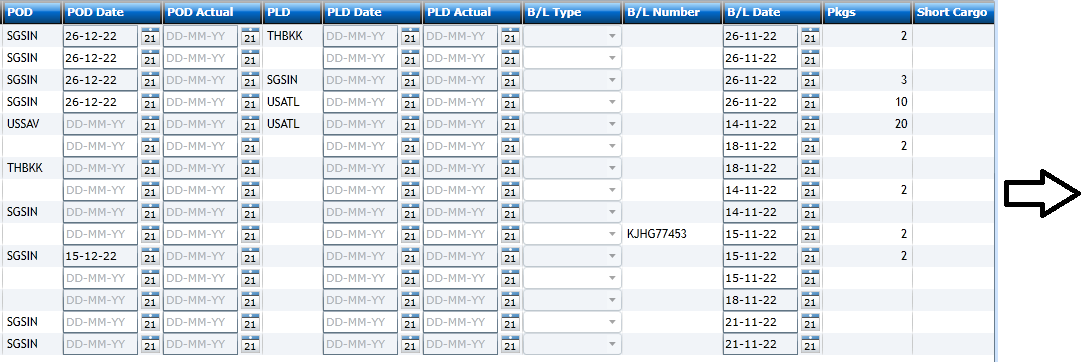
|
POD |
Display the Port of Discharge. |
|
Display the Expected Port of Discharge Date. |
|
|
Display the Actual Port of Discharge Date. |
|
|
Display the Place of Delivery. |
|
|
Display the Expected Place of Delivery Date. |
|
|
Display the Actual Place of Delivery Date. |
|
|
Display the B/L Type. |
|
|
B/L Number |
Dispay B/L Number. |
|
B/L Date |
Display the B/L Date. |
|
Display no. of package. |
|
|
Display the Text field from Cargo Section/MRN Customs section |
To be continued under next image

|
Weight |
Display the Gross Weight |
|
Display the Volume (CBM) |
|
|
Display the no. of containers. |
|
|
Display the Size and Type of the first container |
|
|
Display the total number of Teus. |
|
|
Display the container no from Item 1 in the cargo section. |
|
|
Display the Vessel name. |
|
|
Voyage |
Display the Voyage number. |
|
Branch |
Display the Branch from the booking |
|
Dispaly our ref. (the User initial from the booking) |
|
|
Display the Customer ref. |
|
|
Carrier Book |
Dispaly the Carrier Booking number. |
To be continued under next image
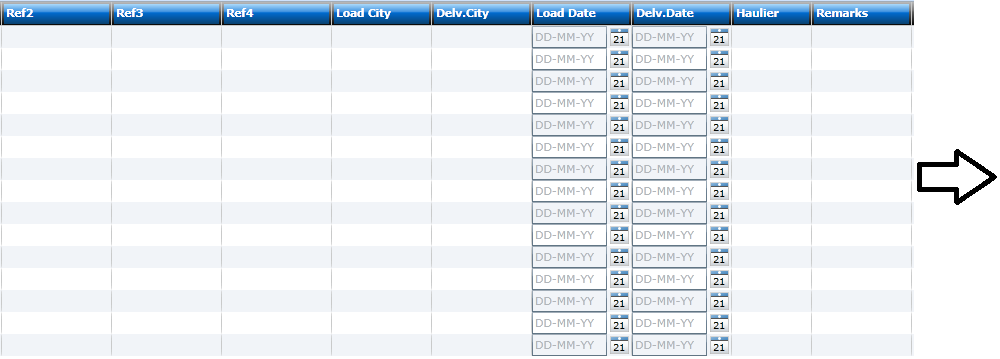
|
Ref2 |
Display reference No2 details from the booking. |
|
Display reference No3 details from the booking. |
|
|
Display reference No4 details from the booking. |
|
|
Display the Loading City from the Haulage Tab. (Type = Multiple. 1st line = Load details) |
|
|
Display the Delivery City from the Haulage Tab. (Type = Multiple. 2nd line = Delv. details) |
|
|
Display the Loading Date from the Haulage Tab. |
|
|
Display the Delivery Date from the Houlage Tab. |
|
|
Haulier |
Dispaly the Name of the Haulier from the Haulage Tab. |
|
Remarks |
Dispaly the first remark field on the Haulage Tab. |
|
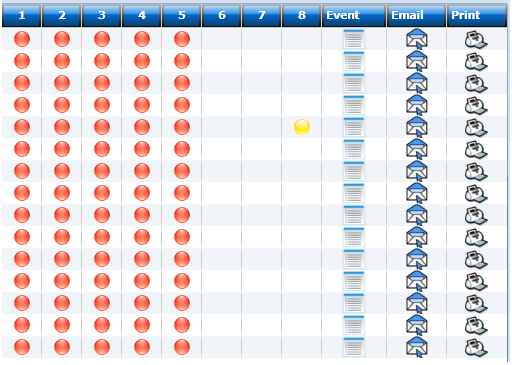
These are lamps indicating the actions made in each Booking. Or rather the lowest value of the lamps in Booking level. You can amend the numbers to a more understandable text using the Skinning feature. The lamps are configured through the Event System. |
|
|
Pressing this icon you will be able to see the history of the events and Fire Manual Events. |
|
|
Pressing this button will open an option to email a document directly. Please refer to the Output Entries to see how this shall be configured. |
|
|
Pressing this button will open an option to print a document directly. Please refer to the Output Entries to see how this shall be configured. |
Buttons in Booking block
|
|
Clicking tis button will open the Booking highlighted. |
|
|
This button is prepared for sending EDI if set up. |
|
|
Clicking this button will open the Quotes for this Customer. |
|
|
Select the Houses and click the button. This will create a Master booking. |
|
|
Add and Delete buttons are not active. Please add and delete bookings in the Booking Module. |
|
|
Clicking this button will Refresh the Booking overview and display latest updates. |
Search Filters (Type: Files)
Changing to File View, the search parameters changes.
The B/L Date, becomes File Opening Dates, Imp/Exp is only active on Type Book, Status is not the 'Book EVENT Status', the actual File Status.
The Parameters in the second line are not active in Type File mode, as they are Booking related.
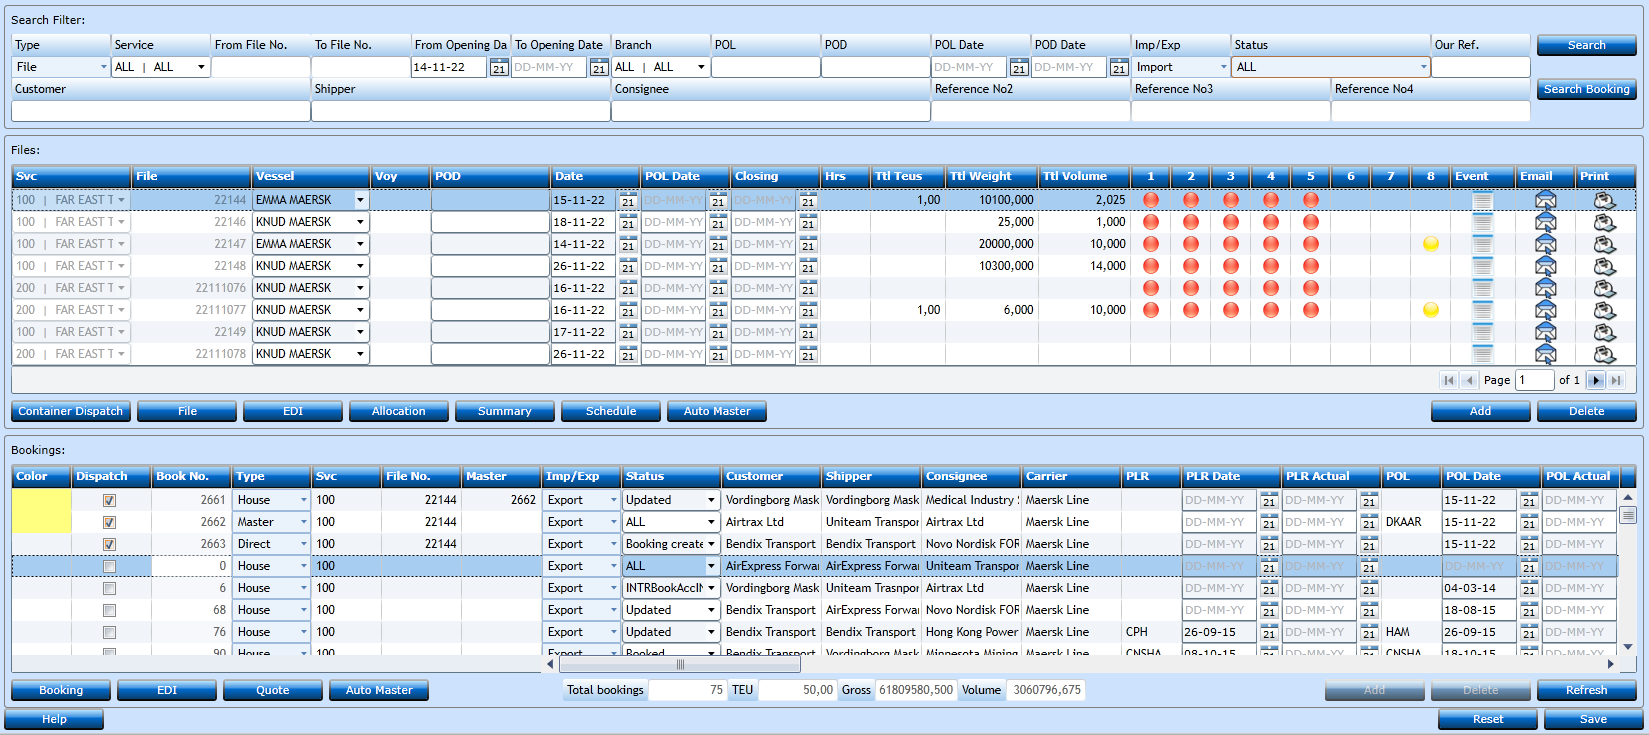
In the Files block information on File level will be displayed. (The Booking part will cover the bottom part of the screen)
|
Display the Service. |
|
|
Display the File No. |
|
|
Display the Vessel Name. |
|
|
Display the Voyage No. |
|
|
Display the Port Of Loading inserted in File level. |
|
|
Display the Opening Date of the File. |
|
|
Display the Closing Date at Terminal. |
|
|
Display the Closing Time at Terminal. |
|
|
Display the Total number of teus booked on this File. |
|
|
Display the Total Gross Weight booked on this File. |
|
|
Display the Total Volume booked on this File. |
|
These are lamps indicating the actions made in each File. Or rather the lowest value of the lamps in Booking level. You can amend the numbers to a more understandable text using the Skinning feature. The lamps are configured through the Event System. |
|
|
Pressing this icon you will be able to see the history of the events and Fire Manual Events. |
|
|
Pressing this button will open an option to email a document directly. Please refer to the Output Entries to see how this shall be configured. |
|
|
Pressing this button will open an option to print a document directly. Please refer to the Output Entries to see how this shall be configured. |
Buttons in Files block
|
|
Clicking this button will open the Container Dispatch screen. |
|
|
Clicking this button will open the File. |
|
|
Clicking this button will open the Allocation screen of the File. |
|
|
Clicking this button will display a new screen summarizing the Booking on this File per Customer. |
|
|
Clicking this button will open the Schedule of the File. |
|
|
Clicking this button will check the House bookings and create Master(s). You will be asked if the system shall create one Master per House or one Master for all Houses. |
|
|
Clicking this button will open a new line for inserting a new File. |
|
|
Clicking this button will delete a File if you have not added bookings. |


