Booking
Booking
When you open a Booking it will default to the newest inserted. If you need another Booking simply insert the Booking No. field and press tab.

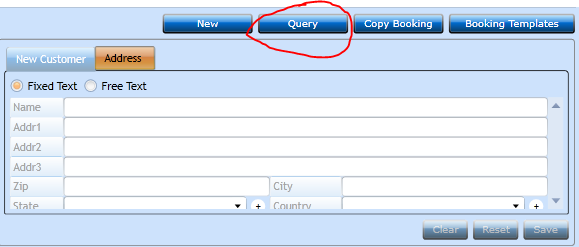
You can also press the Query-button and a new screen opens for you to insert the Query criteria.
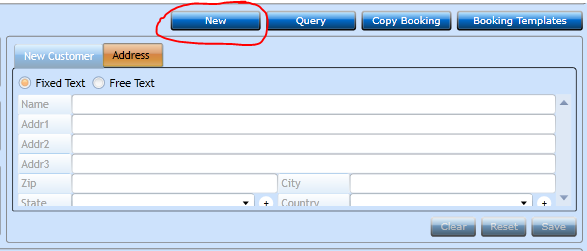
If you want to create a new Booking press the New-button.
|
Book No. |
This is a unique reference for this Booking, and will be assigned by the system. You can search an existing Booking very easily by inserting the Booking No. and then press tab. |
|
|
Book Type |
Choose between Less Load, Full Load or Domestic. |
|
|
Svc |
The Service will take the default from the Profile setting, but you can select another using the drop-down list. Or you can type in the new Service Code using the "+". |
|
|
File |
If you wish to add the Booking to an existing File start entering the File No. and a list of existing files will appear. Please note that you have to press If you wish to create a new File press the "+" and a new screen will open where you can insert Opening Date. Please note that this is possible only for Book Type Full Load. The File No. will be Auto-assigned. In the fields Carrier, Reg. No. 1, Reg. No. 2 you can start typing the Name and the system will display a list with matching names. To insert Date use the Calender-button or write the date manually. |
|
|
|
|
|
|
Pos |
The Position No. will indicate the number the Booking has on the File. Leave it empty and the system will assign next available. |
|
|
Imp/Exp |
Choose between None, Import, Export, Transit. |
|
|
Date |
|
|
|
Event Status |
You can set the system up to inform a Booking Status depending on the steps you design the Booking to move in. Setup is made under the Event system. |
|
|
Booking Status |
Will be Auto-assigned to Open. |

|
Shipper |
Start typing either the Customer number or Name and the system will display a list of matching names. To create a new Customer press the When finished press Save [F8]. |
|
Consignee |
Start typing either the Customer number or Name and the system will display a list of matching names. To create a new Customer press the When finished press Save [F8]. |
|
Customer |
Start typing either the Customer number or Name and the system will display a list of matching names. To create a new Customer press the When finished press Save [F8]. |
|
Supplier |
Start typing either the Customer number or Name and the system will display a list of matching names. To create a new Customer press the When finished press Save [F8]. |
|
Delivery |
Start typing either the Customer number or Name and the system will display a list of matching names. To create a new Customer press the When finished press Save [F8]. |
|
Agent |
Start typing either the Customer number or Name and the system will display a list of matching names. To create a new Customer press the When finished press Save [F8]. |
|
|
|
|
Advanced Search |
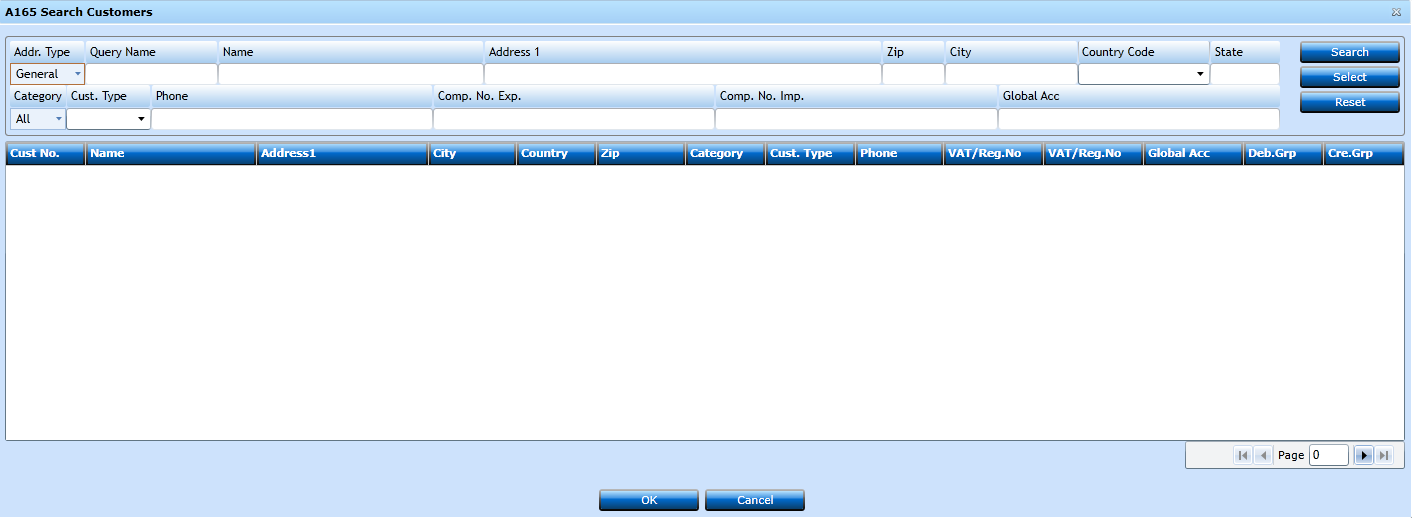
If you want a more detailed search for part from the Customer File instead of typing Customer number or Name press Ctrl + F which will open the advanced search screen to pinpoint the desired part: |
|
|
|
|
|
Any combination of the search filter(s) set will look up any part in the Customer File matching the criteria. Once part is found simply double click the part |


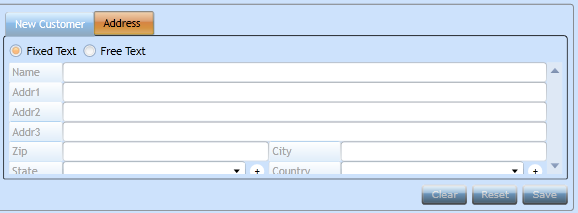
For all parties you are able to create an Address, only to be used in this Booking. Press the ![]() -button. When finished press Save [F8].
-button. When finished press Save [F8].
|
Terms |
Drop-down list available. If you want to create new Terms press "+", and then press Add [F2]. When finished press Save [F8]. |
|
Terms Text |
Filled out on the basis of the field Terms. Extra text can be inserted. |
|
Your Ref. |
Type Ref. from Customer. Used for Invoice/Credit Note/Settlement. |
|
LRN |
Local Ref. No. used for identification using the Danish Customs integration. Number is auto-assigned by system. |
|
MRN |
Master Ref. No. from the Customs Authorities. |
|
Quote No. |
Drop-down list available if Quote has been made for the Customer and the Service. Press the L-button to activate the Quote. |
|
Carrier Quote |
Will be Auto-assigned by the system when a matching Quote has been linked. |
|
Our Ref. |
Auto-assigned based on the user logged on. Can be amended manually to another user. |
|
Branch |
Auto-assigned based on the user logged on. Can be amended manually to another Branch. |
|
Activity |
Drop-down list available. If you want to create new Activity "+", and then press Add [F2]. When finished press Save [F8]. |


Cargo section tab
In the Cargo section we have made it possible to insert the most frequently used information directly in the Cargo Line, while additional information can be inserted pressing
the buttons below the Cargo Lines. When pressing one of these buttons the details will be attached to the Cargo Line highlighted.
To add a new Cargo Line press Add [F2]. To copy an existing Cargo Line press the Copy Cargo-button, and to delete a Cargo Line press the Delete-button [F9].

|
Item No. |
System will assign the next available number for the Cargo Line. Apart from showing the number of Cargo Lines this number can be used in the Haulage tab-sheet. |
|
Marks |
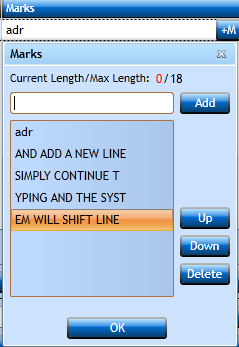
Insert the Marks and No. for the cargo. If there are multiple Marks and No. lines press the and Return. You can reorganize the buttons pressing up and down, or delete a highlighted line. Press OK to return to the Cargo Lines.
|
|
Pkg. |
Insert the number of Packages in the Cargo Line. If you need to register Inner Packing for Hazardous Cargo then press the |
|
Pkg. Type |
Insert the Type of Packing from the drop-down list displaying values from the Package Types tables. If you need to control these codes are always used, you can set a switch in the Service Register. If you want to add a new Package Type press "+" and press Add [F2]. When finished press Save [F8]. |
|
Description |
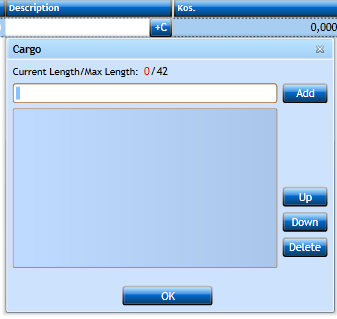
Type the description of the cargo. If you want to save the Description press the
|
|
Kos. |
Cargo Gross Weight. |
|
Volume |
The total Volume of the cargo. |
|
Unit |
Start typing the Volume Unit to be used and the drop-down will display the values. If you want to create a new Volume Unit press the "+" and press Add [F2]. |
|
Status |
Choose from the drop-down list, Direct, Warehouse, Stored. |
|
Pallets |
Insert the number of pallets. |
|
Type |
Start typing the Type of Pallets and the drop-down will display the values. If you want to create a new Volume Unit press the "+" and press Add [F2]. When finished press OK or [F8]. |
|
Exchange |
Insert the number of pallets to be exchanged. |
ADR/IMCO/Temp-button
When pressing the IMCO-button the screen will open with the details of the Cargo Position highlighted.

You can shift Cargo Position pressing the ![]() arrows.
arrows.
The first line will display the details of the Cargo Position you are going to add ARD/IMCO/temp details for.
Press ![]() to get back to the Cargo Position.
to get back to the Cargo Position.
MRN/Customs-button
In this section you can add customs information for each Cargo Position. Information on shipment level will be added in the Customs Info tab-sheet.

When pressing the button the screen will open with the details of the Cargo Position highlighted. You can shift Cargo Position pressing the ![]() arrows.
arrows.
|
Tariff ID. |
Insert a valid Taric Code from the drop-down list displaying values from the Taric Register. |
|
Is automatically filled in when the Taric Code is selected. The text displayed is Text 1 from the Taric Register. |
|
|
Select the Country of Origin from the drop-down list displaying values from the Code File Countries. |
|
|
Insert the Procedure Code. |
|
|
Insert the value for Supplementary Units if applicable. |
|
|
Insert the value for the Statistical Value of the cargo. |
|
|
Select the correct T-Status for the shipment. The default is set in the Service Register. |
|
|
Select the Preference Code from the drop-down list displaying valid values from the Code File Preference Codes. |
|
|
If the cargo is sensitive then insert the number of sensitive packages. |
|
|
If the cargo is sensitive then insert the Type of Packing. |
|
|
Chrg. Weight |
Chargeable Weight is calculated by system when entering no of packages and dimensions. |
|
Length |
Insert lenght of cargo (cm). |
|
Width |
Insert width of cargo (cm). |
|
Height |
Insert height of cargo (cm). |
|
VAB |
'Varebestemmelseskode' / Trade Regulations. Insert the required Trade Regulations from the drop-down list. If you want to create a new press "+". |
In the next block you can insert additional information required for the customs procedure. Depending on the procedure you can choose between different information.
Press the Add-button and a new line will open.

|
Select the Type of information you wish to add from the drop-down list. |
|
|
If a Document Code is chosen you need to select a Document Type in the Code field. |
|
|
Insert the Document Number - or if MRN the MRN No. |
|
|
If the MRN is complete check the box. |
Press the Save-button [F8] or Add [F2] if you wish to insert additional customs information.
Press ![]() to get back to the Cargo Position.
to get back to the Cargo Position.
Customs/Add. tab
In the Customs/Add tab-sheet additional details for the customs declaration/Intrastat is inserted.

|
Exp. Decl. |
Insert official declaration code for the Export Declaration. |
|
EU Decl. |
Insert official declaration code for the EU Declaration. |
|
Transit |
Insert official transit code for the export Declaration. |
|
Special |
Insert official code for the export Declaration. |
|
Intra/Std |
Choose None, Yes, No, if information is for Intrastat report. |
|
Ctr |
Choose None, Yes, No, if cargo is loaded in Container or not. |
|
Storage |
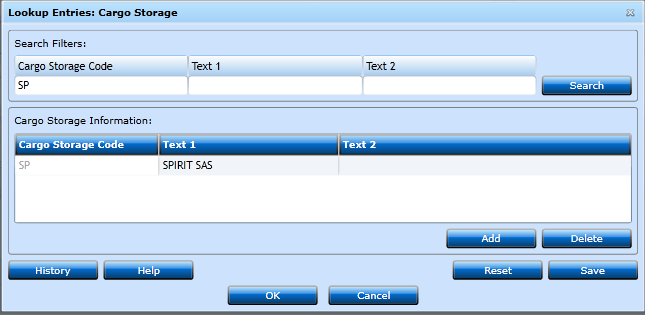
Choose from the drop-down list to select, authorized cargo storage location. If you want to create a new Storage location press the "+". |
|
|
Now you can both Search and add a new Cargo Storage Code. Press Add [F2], and when finished press OK or [F8].
|
|
Cargo Storage Code |
Internal code for the authorized Storage location. |
|
Text 1 |
Insert name of the authorized Storage location. |
|
Text 2 |
Insert the authorization code of the Storage location. |
|
Act/Exp |
Select whether following date/time is Actual or Expected. |
|
Date |
Insert the Date or use the Calendar-button. |
|
Time |
Insert the Time or use the Clock-button. |
|
|
|
|
Inv. Type |
Insert invoice type, to create new code press "+". |
|
Inv. Currency |
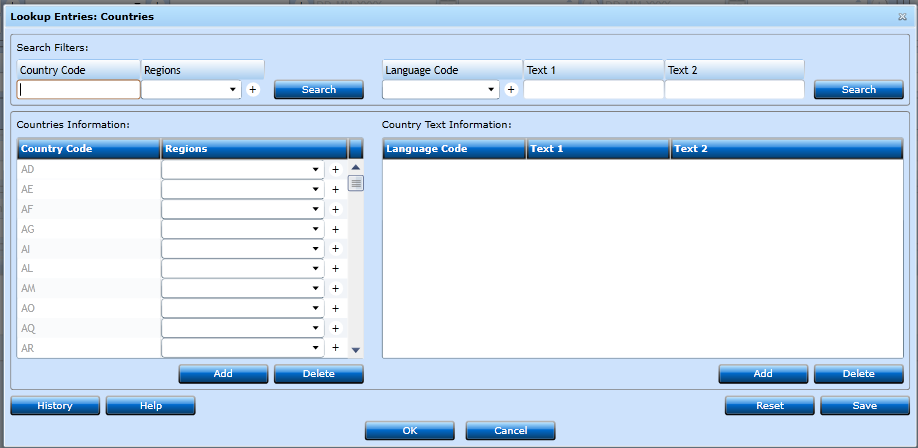
Start typing the Customs currency and the drop-down list will be available. If you want to create a new code press the "+". It is possible to Search Country Code, and create a new Country Code. To create a new Country Code press Add [F2]. When finished press [F8].
|
|
Inv. Amount |
Insert the Amount. |
|
Inv. Date |
Insert the Date, or use the Calendar-button. |
|
Inv. Number |
Insert the number. |
|
|
|
|
Value Curr. |
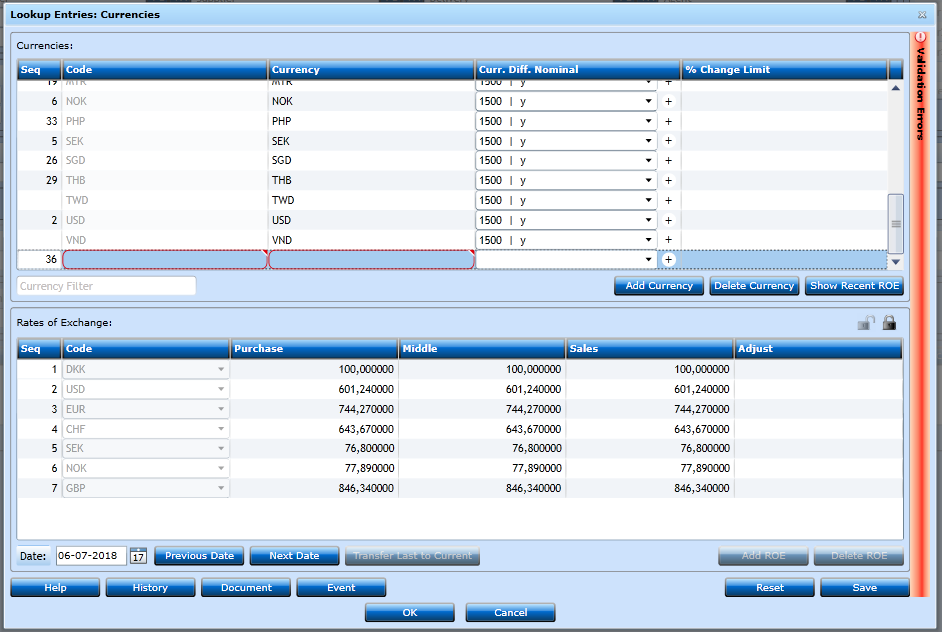
Insert the Currency, or choose from the drop-down list. If you want to create a new Currency press the "+". Press Add [F2] to create a new Currency and press Save [F8[ when finished.
|
|
Value |
Cargo value for insurance purposes etc. |
|
Customs Ref. |
Insert Customs Reference if available. Not mandatory. |
|
Customs Clearance |
Insert the responsible representative for the Custom Clearance. |
|
Supplementary Info |
Free text field to be used for further information. |
NCTS block
Press Add [F2] to
|
Curr. |
Field used for NCTS (T-doc.). Insert the used Currency from the drop-down list. If you want to create a new Currency press "+". |
|
GRN |
Field used for NCTS (T-doc.). Insert the GRN number. |
|
Access |
Field used for NCTS (T-doc.). Insert the Access number. Maximum of 4 characters. |
|
Other |
Field used for NCTS (T-doc.). Insert text if required. |
|
Curr. |
Field used for NCTS (T-doc.). Insert the used Currency from the drop-down list. If you want to create a new Currency press "+". |
|
Amount |
Field used for NCTS (T-doc.). Insert the amount for the current shipment for the guarantee. |
Remarks tab
In this sheet you can insert text and direct it to a specific report/document.

|
Type |
From the drop-down list you can decide in which document the remark(s) shall be printed. |
|
At |
In this drop-down list you can select a set of remarks from the Remarks table. |
|
Code |
If you select a full set of remarks from the Remarks table this will have a default. But you can amend to another value in the drop-down list displaying codes from the Remark Code table. |
|
Text |
Insert the text you want to print in the document. If you have linked from the Remarks table it will be inserted automatically. |
Haulage tab
In this section you can add information for ordering local pick up or delivery of the shipment.

|
Haulage |
Select if haulage is arranged by Agent, Carrier or Merchant. |
|
Haulage Type |
Haulage Type Information. For instance DT for 'Delivery terminal or PU for Pickup at Client. You can create your own types in the Haulage Type table. |
|
Select a valid Carrier from the drop-down list displaying values from the Code File Carrier. If missing, you can create directly in the Code File Carrier, pressing the "+". |
|
|
This will be assigned by the system for the next available line in this Booking. You can issue multiple haulages from this screen. |
|
|
If you have created a Sequence in the table Transport Document No. the system will select next available when printing the document. You can add manually as well. |
|
|
Possibility to the Haulier Quote No. if received. |
|
|
Select the Currency in which the transport will be invoiced. You can select a valid value from the drop-down list displaying values from the Currencies table. |
|
|
Possibility to insert the rate agreed for the trucking. |
|
|
If you exchange EDI with the Haulier this field is reserved for the Booking No. returned from the Haulier. |
|
|
If you exchange EDI with the Haulier this field is reserved for the Trailer No. returned from the Haulier. |
|
|
If you exchange EDI with the Haulier this field is reserved for the confirmed Haulage Date. |
|
|
If you exchange EDI with the Haulier this field is reserved for the confirmed Haulage Time. |
|
|
System will update the status as the Haulage Booking proceeds through the system. |
In the next line the loading information is inserted - where the cargo shall be loaded and when.

|
In this drop-down list you can select where to load if the address is already inserted in the Parties block above. When selecting a Party the system will insert the details. You can select a predefined Loading Address from the Address List on the Customer via the Select Addr.-button, or you can also leave Type empty and insert the details manually. |
||
|
Name |
When selecting Type, the Name of the Party will be inserted, but you can amend manually as well. |
|
|
Contact |
If the Loading Address is in the Customer Register you can select a Contact Name from the Customer Contacts. |
|
|
Addr 1+ 2+ 3 + Zip + City + Country, etc.… |
When selecting Type, the Address of the Party will be inserted, but you can amend manually as well. |
|
|
Date |
Insert the Date when cargo has to be loaded or unloaded. |
|
|
Time |
Insert the Time when cargo has to be loaded or unloaded. |
|
|
Freight Payer |
Here you can indicate who shall pay for the haulage. Start typing the Name and the system will display a drop-down list with matching names. |
|
|
Remarks |
|
In the last section you can add the details of the cargo pressing one of the two buttons or delete cargo.

![]()
Pressing Add Entry will open a new screen displaying the various cargo positions in the Booking.

Select the one you will issue haulage for and press OK, and the system will insert the details in the Haulage tab.
![]()
Pressing Add Cargo will simply open a new line for manual input.

|
Item No. |
Links to the Cargo Section Item No. When selected the system will copy the details from this Item No. in the Cargo section, when you use Add Entry. |
|
Pkgs |
Display the number of Packages. Can be amended manually. |
|
Pkg. Type |
Display the Packages Unit. Can be amended manually. |
|
Description |
Input Cargo Description. |
|
Kos |
Display the weight of the cargo. Can be amended manually. |
|
Volume |
Display the measurement. Can be amended manually. |
|
Unit |
Display the Measurement Unit. Can be amended manually selecting another valid value from the drop-down list displaying units from the Code File Volume Unit. |
|
Pallets |
Number of pallets. Can be amended manually. |
|
Pallet types |
Input Pallet Type from the Pallet Type table. Pallet types can be updated via "+" |
CMR/Borders tab
In the CMR/Borders tab-sheet it is possible to

Invoice tab-sheet
In the invoice tab you can create Multiple Invoices, Credit Notes, Settlements, Internal Invoices and Group Invoices.

If you have linked a Quote you can simply press the Auto Invoice-button and the system will insert the invoice to the Customer. Pressing the Auto Estimate will insert
the estimate(s) in the Quote cost part. If you did not link a Quote then press the Add-button [F2] and a new line will open.

|
Will display each Invoice made with a unique Order No. |
|
|
Select the Type of Document you wish to issue. Default will always be Invoice or Group Invoice if indicated in the Customer Register. If you need to insert an Estimate, the Type must be Settlement and status at the end of the line Estimate. |
|
|
If issuing a Credit Note you may wish to see the reason. If this is the case then select a valid value from the drop-down list displaying values from the Code File Reason Code. You may even be forced to insert a Code before issuing a Credit Note if the setting in the Allow credit with reason is chosen in the Company Register. These settings are controlled by the accounting department. |
|
|
Will default from the Customer in the Parties section but you can amend by overwriting. You will only be able to insert a Party having a valid Debtor Group in the Customer Register. |
|
|
Will default from the Customer Register in the Debtor Curr. You can amend this manually choosing another Currency in the drop-down list. |
|
|
If you choose Internal Invoice in Type you can issue an Invoice from this Booking to another Booking. Insert the receiving Booking No. here, or go to the next field. |
|
|
If you choose Internal Invoice in Type you can issue an Invoice from this Booking to another File. Select a valid Service from the drop-down list, and go to the next field and insert File No. |
|
|
If you choose Internal Invoice in Type you must insert the File No. here. This will be automatically inserted if you already added the Booking No. |
|
|
The Terms of Payment will default from the Customer Register in the Debtor T.o. Paym. If allowed internally you can adjust manually. |
|
|
Will be inserted automatically when the invoice is printed after the rules stipulated in the Service register. |
|
|
Svc.Date |
Legal requirement in Poland and Baltic countries for VAT reporting purpose. |
|
Job No. |
Can combine result for several Modules (Air, Sea etc.) projects via unique Job. No. |
|
Status |
Will show the status of the Invoice or Estimate |
|
The invoice number will be assigned when the invoice is printed. |
|
|
Indicates who issued the invoice. |
|
|
|
|
|
Show PDF |
If you send E-mail invoices it will be shown here after Invoice Distribution is executed by finance provided the customer set up is for E-mail Invoice |
Now press the Invoice Details-button
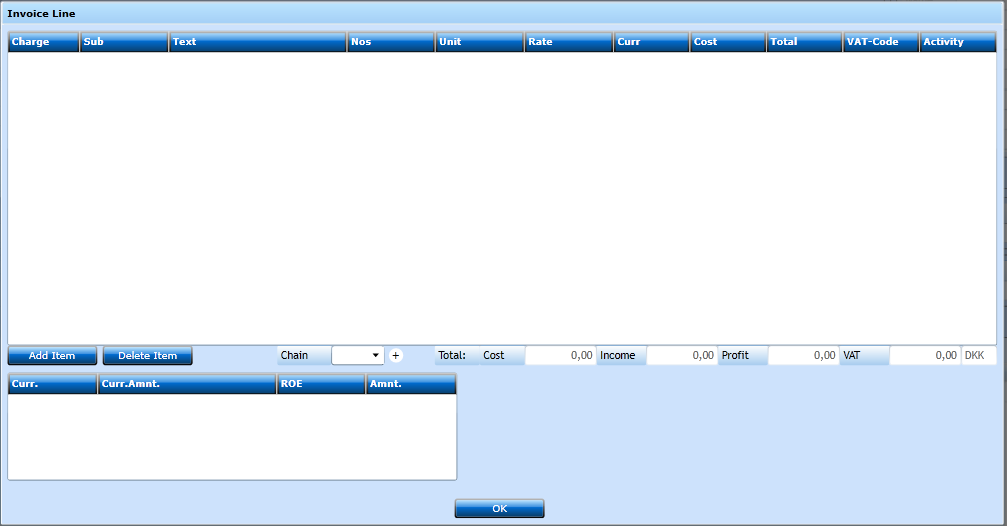
Now you can insert the Invoice Lines by pressing the Add item-button or use the Charge Chains function.

A new line opens for input.

Depending on the creation of the charges the system will now insert the default values from the selected Charge. You can amend each field manually if needed.
Please refer to the Charges Calculation Type section for explanation of the setup.
Press Add Item to insert another line if needed, or OK to return to the Invoice header.
While in the Invoice tab sheet press the Print-button and the Invoice will be printed.
Events tab
The Event tab will show the system and manual events (if any generated) for the Booking.

For guideline, how to define/setup Events, look at Event Configuration, Book Event Status and Book Event Configuration.
Booking Template
If you want to create a new Booking using a template - press Booking Templates.
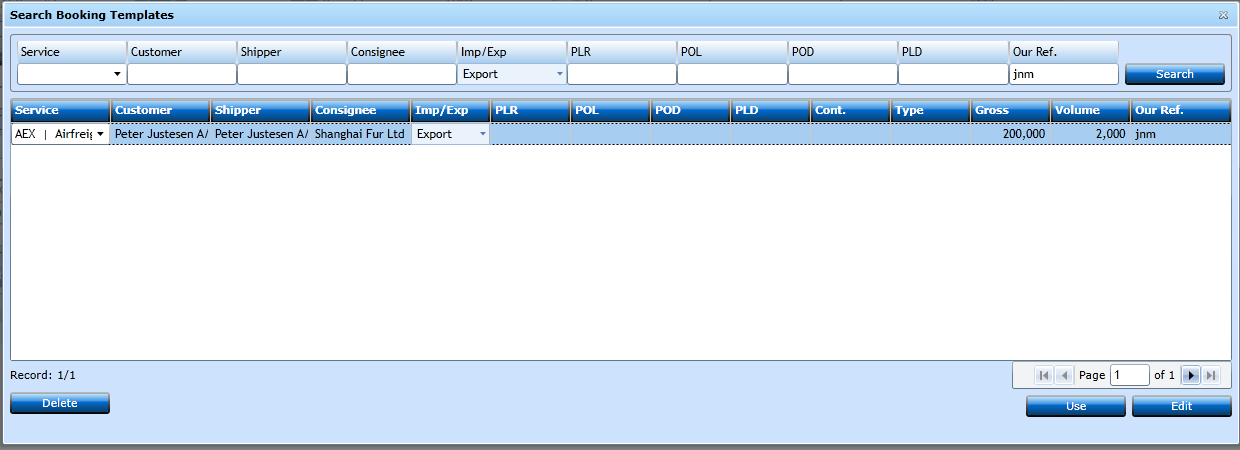
A template in the list can now be converted into a new Booking by clicking the Use-button or you can click the Edit-button to adjust the template.
You are also able to delete a template.
Remember to click on the Save-button [F8] when saving an edited template – not the Save as Template, which will create a new template.
If your system configuration uses skinning on required fields, these skin-settings will be skipped in the template and only applied in for the real Booking.
The Booking Type indicator to show as Template, when editing a booking template.
If you want to create a template - press Save as Template.
When you have a Booking which will reoccur frequently, you can save it as a template for future use.
The template is a normal Booking, but with a Booking Status Template, which will be excluded from statistics.
Save a relevant Booking using Save as Template.


